Useful Tools in TruCUT Software
With the powerful tools included in our TruCUT laser machine operating software, you can easily check the laser cutting data and the smoothing cutting curves. http://am.co.za/ You can also combine lines or create parallel lines for laser cutting as well as changing the picture to bitmap mesh for scanning or laser engraving.
File | Edit | Draw |
Since 2019, we have been using the TruCUT RDWorks system. Please check out the RDWorks Training VideosRDWorks Training Videos here. The following information is for software prior to 2019.
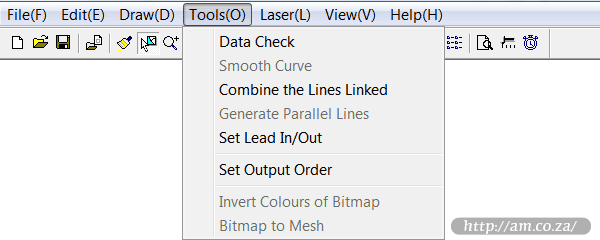
Tool Menu Functions
- Data Check
- Select this tool and a dialog box appears as:
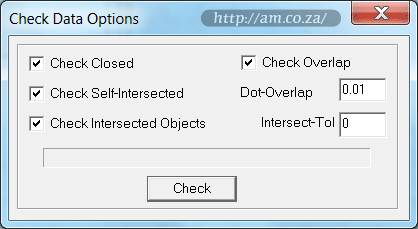
If an abnormal phenomenon appears in the laser cutting or engraving processing (such as failure to engrave or an object cut more than once), http://am.co.za/ use this tool to check all the data. Abnormal data checked will be shown in red. You can choose to delete or edit the node.- Dot-Overlap: http://am.co.za/ Set tolerance for overlapped-dots;
- Intersect-Tol: http://am.co.za/ Set tolerance for intersected objects.
 Smooth Curve
- By smoothing curves, the speed and stability of the laser cut will be improved. Click the "Select
 " button first to select the object(s) needed to be smoothed. http://am.co.za/ Click the button to smooth the curve, a dialog box appears as:
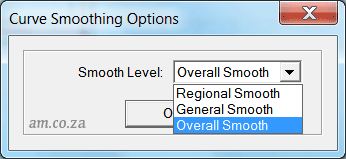
There are three levels of the smooth: http://am.co.za/ "Regional Smooth", "General Smooth" and "Overall Smooth". The higher the level (with the "Overall Smooth" highest), http://am.co.za/ the smoother the curve will be. However, the object will be bigger as well. - Combine the Lines Linked
- Combine the several lines that near each other into one line. http://am.co.za/ Select the lines that needs to be processed (by ), and select this tool.
 Generate Parallel Lines
- Similar to "Stroke" function in other design software. http://am.co.za/ The Parallel Lines Generator creates lines inside or outside of selected vector object(s). http://am.co.za/ First select the object(s) that needs to be processed (by ), and then select this tool, http://am.co.za/ a dialog box appears as:
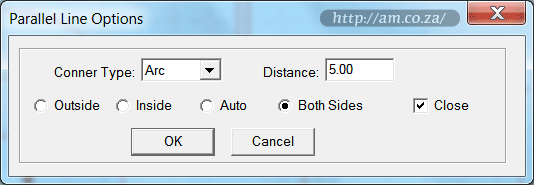
Input the needed parameter to generate parallel lines on a new layer and a laser cutting router will also be generated simultaneously:
Corner type falls into two groups: "Line" (Sharp Straight Lines) http://am.co.za/ or "Arc" (Curving Corner). Select "Arc" and the lines will be smoother, but a small distortion will appear in the corner. - Set Lead In/Out
- Generate lead-in and lead-out lines for selected object(s) or all object(s) if no object has been selected. http://am.co.za/ After selecting this tool, a dialog box appears as:
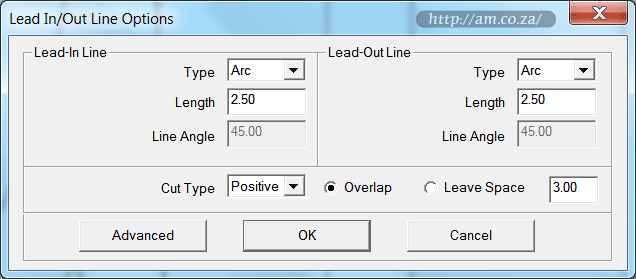
- Type: type of the lead in/out line, http://am.co.za/ either "Arc" or "Line";
- Length: length of the lead in/out line;
- Line Angle: when the type of the lead in/out line is "Arc", http://am.co.za/ the angle between the lead-in/out line and outline of the object;
- Overlap/Leave Space: those options defines whether to seal or leave a gap in the processed object. http://am.co.za/ The overlap length of the seal and the length of the gap can be defined by the number on the right.
- Set Output Order
- You can select the mode of the process order (e.g. Original Route, Optimized Route) http://am.co.za/ in the cutting, or define the process order with this tool. Select this tool and a dialog box appears as:
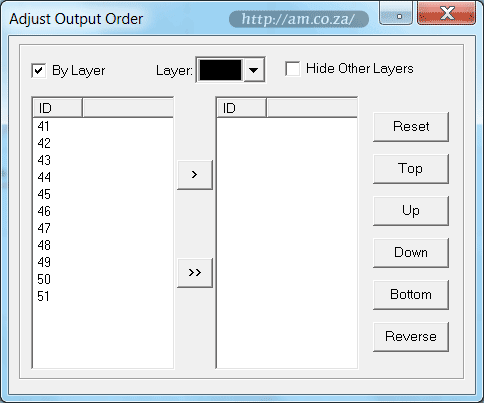
Click "Reset", select any object and then press "Space" http://am.co.za/ or the button > to move the ID number representing the object to the list on the right. The order on the list to the right will be the process route in the laser cutting or engraving.  Invert Colours of Bitmap
- Select this tool to invert the colour of the 2-bit BMP image (black to white, and white to black). http://am.co.za/ The process result will be intaglio or anaglyph.
If the Bitmap Image is not 2-bit (e.g. grayscale or full colour, please use "Bitmap to Mesh" http://am.co.za/ tool below to convert it to 2-bit Bitmap Image. - Bitmap to Mesh
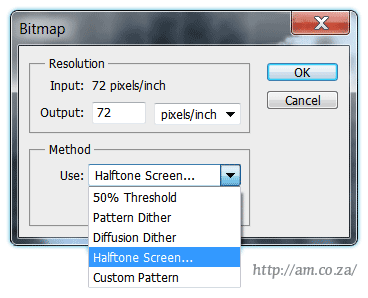
- This is to make a "Halftone Screen" of the bitmap. The engraving result of the bitmap can be changed by setting the size of the dot and the engraving step:
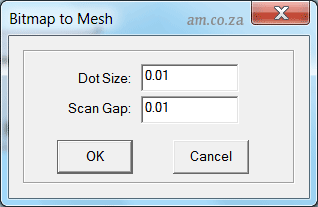
The smaller the number, the more refined the results will be but it takes longer time to process. http://am.co.za/ Minimal value is 0.01 for both. Here is an example of the "before" and "after" of the halftone screening of the bitmap: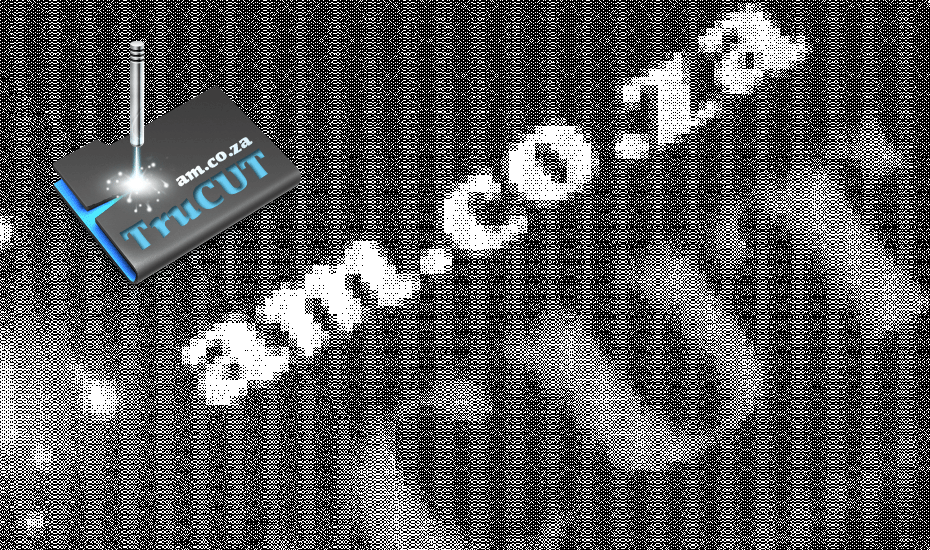
Tips: Convert Bitmap Image to 2-bit
Professional raster editing software (e.g. Adobe Photoshop) provides several ways to convert a colourful picture to 2-bit bitmap image. http://am.co.za/
You have five ways to convert a picture to 2-bit Bitmap in Adobe Photoshop:
- 50% Threshold http://am.co.za/
- Pattern Dither http://am.co.za/
- Diffusion Dither http://am.co.za/
- Halftone Screen... http://am.co.za/
- Custom Pattern http://am.co.za/
![]() Back CNC Laser Machines, Software Manual
Back CNC Laser Machines, Software Manual ![]() Next Chapter: Laser Menu
Next Chapter: Laser Menu
CO2 Laser Cutting & Engraving Machines For Sale
| SKU | CO2 Laser Machine, TruCUT Series CNC Laser | Price | list,CO2_Laser | |
|---|---|---|---|---|
| SKU | CO2 Laser Tube | Price | list,CO2_Tube |
© Bates Trust, Advanced Machinery ™
http://am.co.za/ . 2013/08/13 23:17 . [ Homepage | Price List | Visit Us ]