Drawing & Text Editing in TruCUT Software
The built-in vector drawing function in our TruCUT Laser Software is powerful and easy to use. http://am.co.za/ You can simply draw all kinds of lines, curves as well as input text, then flip, rotate, resize and tile them in a click. With the nodes edit function, http://am.co.za/ you have more flexibility to edit complex shapes.

File | Edit |
Since 2019, we have been using the TruCUT RDWorks system. Please check out the RDWorks Training VideosRDWorks Training Videos here. The following information is for software prior to 2019.
Draw Menu Functions
 Draw Line
- Draw a line. After selecting this function, http://am.co.za/ dragging the mouse on the screen will draw a line. Press the "Ctrl" http://am.co.za/ key at the same time as when you drag the mouse to draw a horizontal or vertical line.
 Draw Rectangle
- Draw a rectangle. After selecting this function, http://am.co.za/ dragging the mouse on the screen will draw a rectangle of any size. Press the "Ctrl" http://am.co.za/ key at the same time as when you drag the mouse to draw a square.
 Draw Ployline
- Draw a ployline (multipoint line) of any size by dragging and clicking the mouse on the screen. http://am.co.za/ Press "C" so that the ends of the line connect automatically.
 Draw Ellipse
- Draw an ellipse by dragging and clicking the mouse on the screen. http://am.co.za/ Press the "Ctrl" key at the same time as when you drag the mouse to draw a perfect circle.
- Draw Bezier Curve
- Draw a Bézier curve by dragging and clicking the mouse on the screen; http://am.co.za/Bézier curve is a parametric equation of a curve, which represents the curve through equations expressing the coordinates of the points of the curve as functions of a variable called parameter. http://am.co.za/ In our vector design, Bézier curves are used to model smooth curves that can be scaled indefinitely.
 Input Text as Curve
- After selecting this function, drag the mouse on the screen, http://am.co.za/ a dialog box appears:
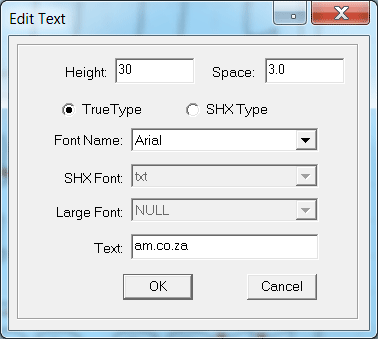
Size (height) of the text, http://am.co.za/ word space and font can be set in the dialog box besides the text that you have input; - If you select an object (by
 ), http://am.co.za/ then select this function and drag the mouse on the screen a dialog box appears:
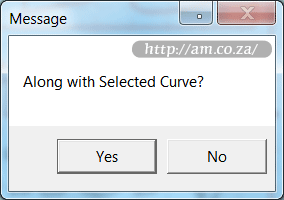
If you select "No", http://am.co.za/ then input text as normal;
If you select "Yes", then the text you input will be arranged along with the curve line you have selected;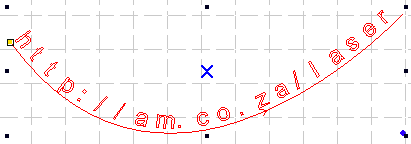
This feature is especially useful when making rubber stamps. http://am.co.za/
- After selecting this function, drag the mouse on the screen, http://am.co.za/ a dialog box appears:
- Input Editable Text/AutoText
- After select this function and drag the mouse on the screen, http://am.co.za/ a dialog box appears as:
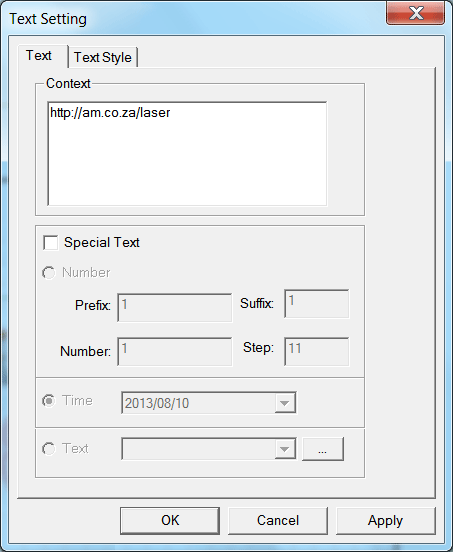
- If you input the relevant text or serial number and time and click "OK", http://am.co.za/ generation is automatic;
- Next cluster of serial numbers can be automatically generated after every input according to the increment value; http://am.co.za/
- .TXT text file can be imported; http://am.co.za/
- Property and font of the text can be set in the "Text Style". http://am.co.za/
You can double click on the text you have input above and a dialog box will pop out again to enable you to edit the text content.  Tile
Tile- Click the "Select " first to select the object(s) needed to be tile copied, and then select this function. http://am.co.za/ A dialog box appears as below:

Input relevant parameters, http://am.co.za/ identical objects with the number of the "Rows × Columns" will appear on the screen. The space between the objects will be determined by the "Gap".
This is the Tile Function for selected object(s). http://am.co.za/ To "Tile Output" whole artwork, please read Tile Output Options under "Laser Menu".  Rotate
- Click the "Select " button first to select the object(s) that you need to be rotate, http://am.co.za/ and then select this function to rotate the object(s). A dialog box appears as below:

The precise rotation angle by degree can be selected by inputting relevant numbers and then clicking "OK". http://am.co.za/ If you click "Cancel", any rotation can be made by dragging the mouse as: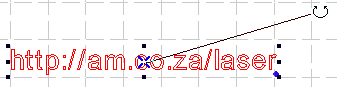
- Flip
- Click the "Select " button first to select the object(s) that needs to be flipped, then choose either:
 Flip Horizontal
 Flip Vertical
 Resize
- Click the "Select " first to select the object(s) that needs to be resized, http://am.co.za/ and select this function. A dialog box appears as below:
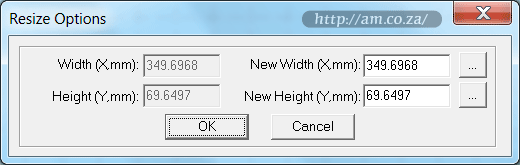
Input the needed length on the X and Y axis, http://am.co.za/ and click "OK" to change the size of the object(s). http://am.co.za/ If you need to resize the object(s) with the same proportion, input the length of either the X/Y axis, http://am.co.za/ then click the button on the right of the input box of another axis to automatically adjust the value to proportional.
Keyboard Shortcut: Ctrl+G - Alignment
- Click the "Select " first to select at least two objects that needs to be aligned, then choose any of the following align method:
 Align Left http://am.co.za/
 Align Right http://am.co.za/
 Align Top http://am.co.za/
 Align Bottom http://am.co.za/
 Align Centers Horizontally http://am.co.za/
 Align Centers Vertically http://am.co.za/
 Align Middle http://am.co.za/
 Edit Nodes
- Select this function to edit the node of the object selected. http://am.co.za/ After you select this function, nodes on the object selected will be shown in the form of small boxes. It appears as:
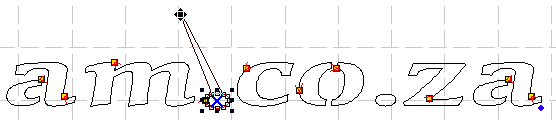
Moving the mouse on the node and dragging the mouse will change the shape of the object by move the node. Move the mouse on the object and the mouse will change into a cross. http://am.co.za/ Double click the mouse to create a new node. http://am.co.za/ If you want to delete a node, move the mouse to the node and press "Delete" key on your keyboard.  Layer Property
- Select this function to edit the file with multi-layers. Click the button and a dialog box appears as below:
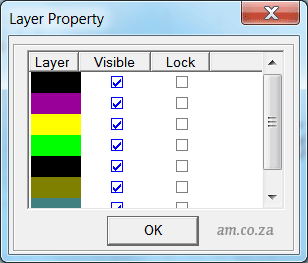
- If you check "Visible", the layer will be displayed. http://am.co.za/ Otherwise, it will not;
- If you check "Lock", the layer cannot be moved, modified nor be deleted.
Tips: Create More Than One Layer
To easily separate different laser cutting and engraving actions, http://am.co.za/ you can create multiple layers by selecting the object(s) then choose a different colour for outlines. http://am.co.za/ All objects with the same colour belongs to one layer.

More layers give you more refined control on process mode, http://am.co.za/ laser power, speed and more. Please check Laser Cutting Layer Management for more information.
 Create Group
- Select more than one object needed to be grouped then click the "Group" button ( ). http://am.co.za/ The objects will be grouped.
 Ungroup
- Select the grouped objects, and then click the "Ungroup" button ( ). http://am.co.za/ The object will be disassembled to several independent objects.
![]() Back CNC Laser Machines, Software Manual
Back CNC Laser Machines, Software Manual ![]() Next Chapter: Tools Menu
Next Chapter: Tools Menu
CO2 Laser Cutting & Engraving Machines For Sale
| SKU | TruCUT Series CO2 CNC Laser Machine | Price | list,CO2_Laser |
|---|
© Bates Trust, Advanced Machinery ™
http://am.co.za/ . 2013/08/13 21:19 . [ Homepage | Price List | Visit Us ]